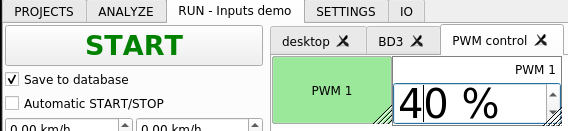
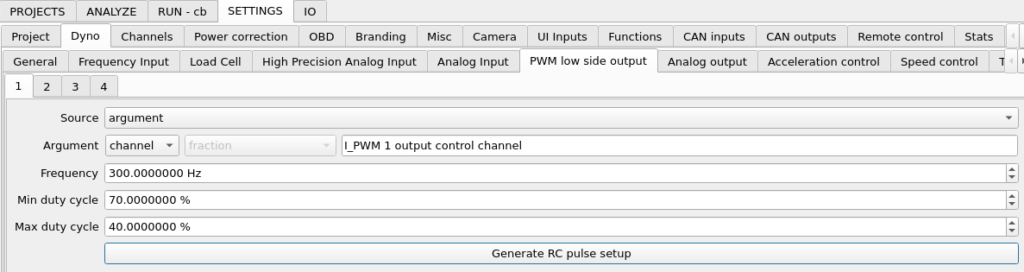
There are times when you need to manually enter a value that is processed by a function, or you like to control analog or PWM output from RUN desktop. To do this, you need to use input channels. This function adds a channel that is available in whole software like any other data channel. The channel value can be changed with a widget placed on desktop in RUN tab.
New channels can be created in SETTINGS / UI Inputs.
Shortcuts for the channels table:
- N – new channel
- D – duplicate channel
- Del – delete channel
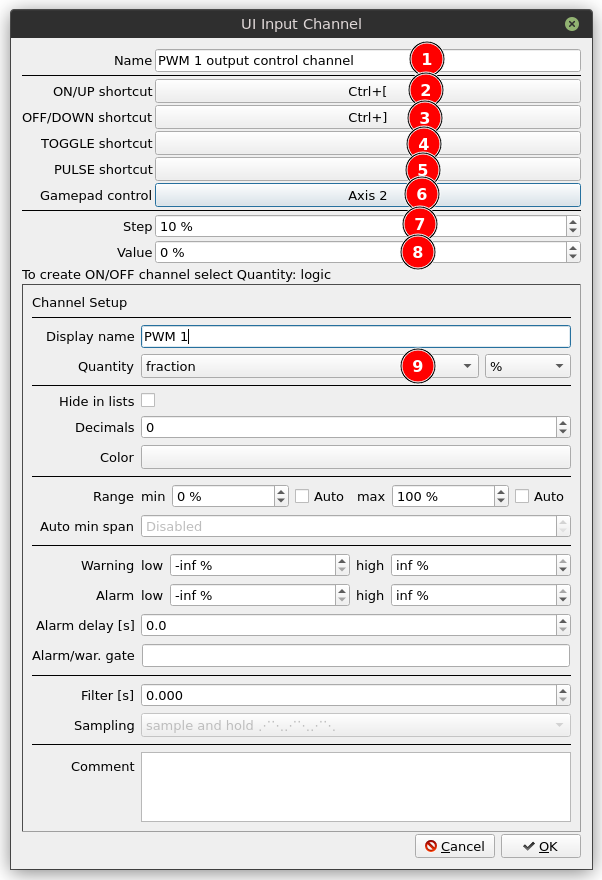
Generic function configuration contains:
- Name used to create dyno data channel key
- ON/UP shortcut will increase the channel value by the value entered in step (7) or if the channel has logic quantity it will set it to 1.
- OFF/DOWN shortcut will decrease the channel value by the value entered in step (7) or if the channel has logic quantity it will set it to 0.
- TOGGLE shortcut will toggle channel value between 0 and 1.
- PULSE shortcut will set the channel value to 1 and after 1s set it back to 0
- Gamepad signal used to control the channel value. Buttons or axes can be used here.
- Step value for UP and DOWN shortcuts.
- Current value edit box
- Quantity set to fraction for PWM output control example
If you need to control the channels from desktop in RUN tab, you can add input button or input spin box widgets.